How to add subtitles in Premiere Pro
Premiere Pro handles subtitles as captions - a track type of their own, separate from graphics and text layers. Once you know which caption type to pick, importing an SRT takes about thirty seconds. Picking the wrong one is why captions sometimes refuse to appear at all.
1. Import an SRT as captions
Import both files like any other asset (Ctrl/Cmd + I), the video and the .srt. Unlike DaVinci Resolve, Premiere needs no timecode surgery: a sequence built from your clip starts at zero, which is exactly where an SRT starts counting.
Step 1 Create the sequence. Right-click the video in the Project panel and choose New Sequence From Clip. This guarantees the sequence settings match the footage, resolution and frame rate included.
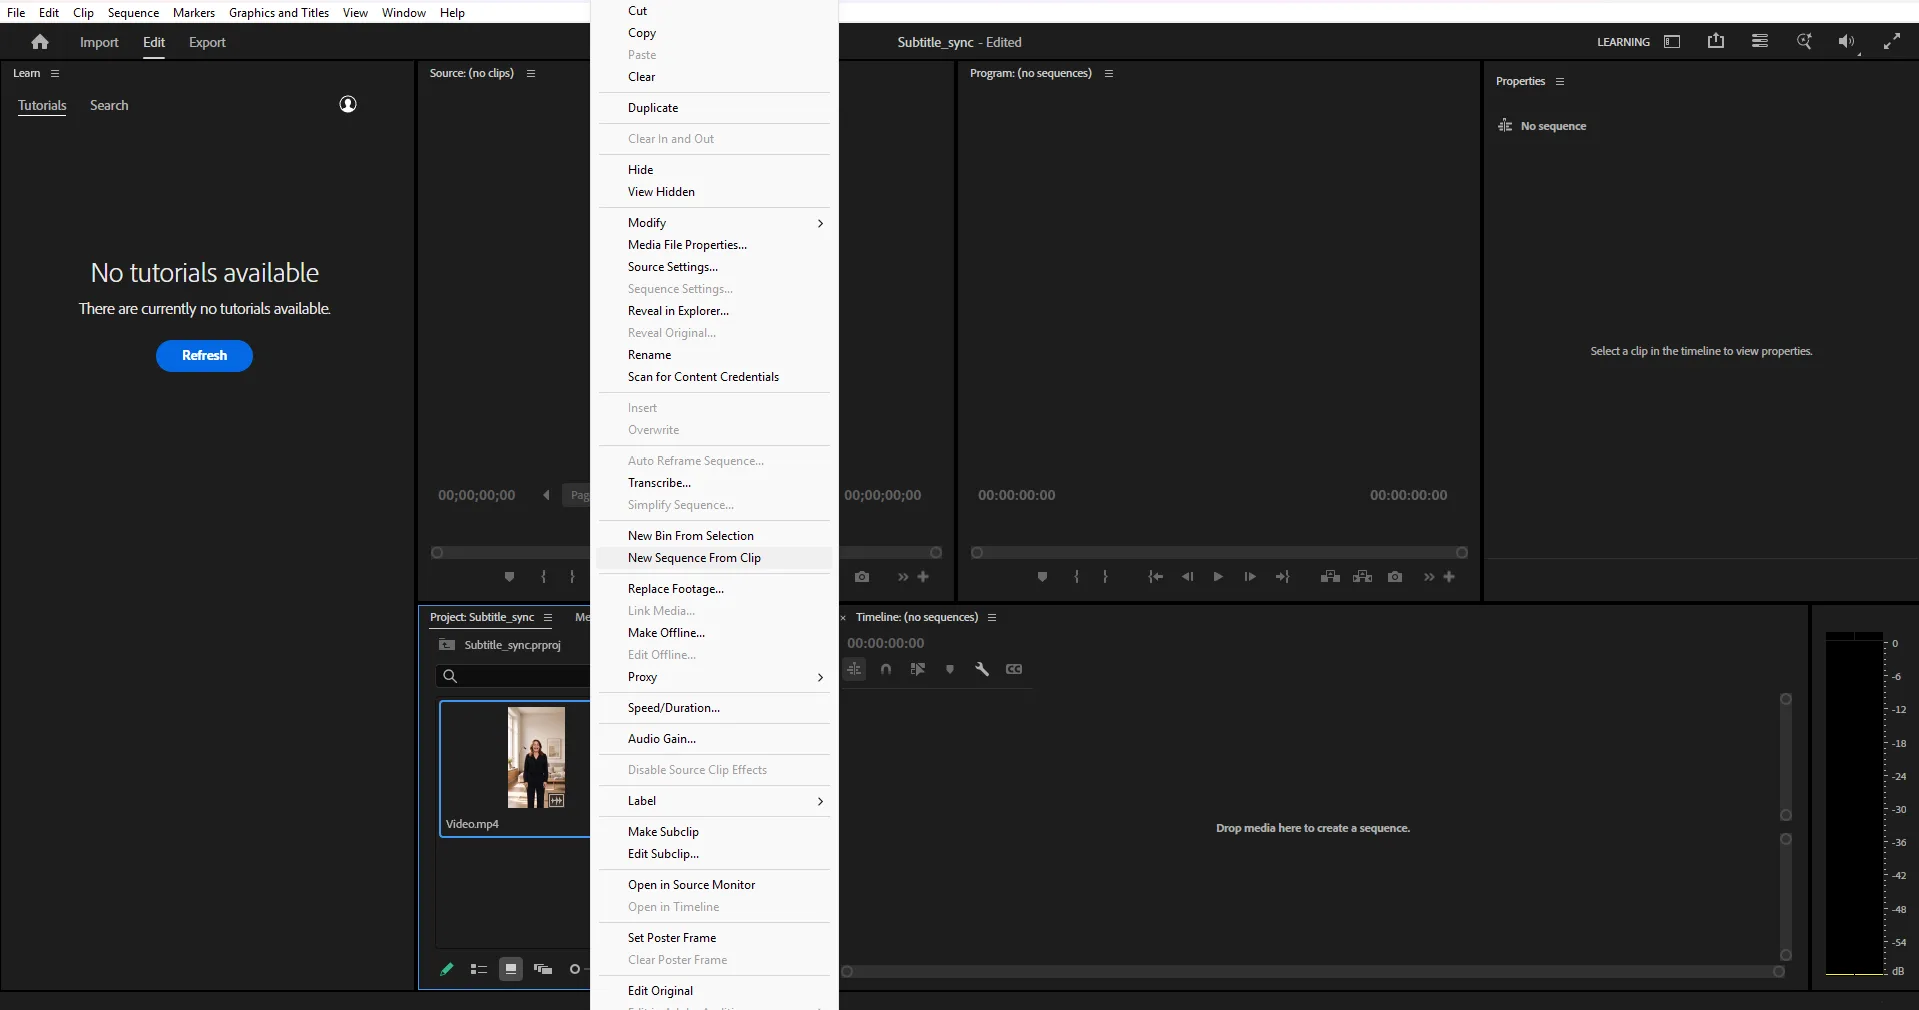
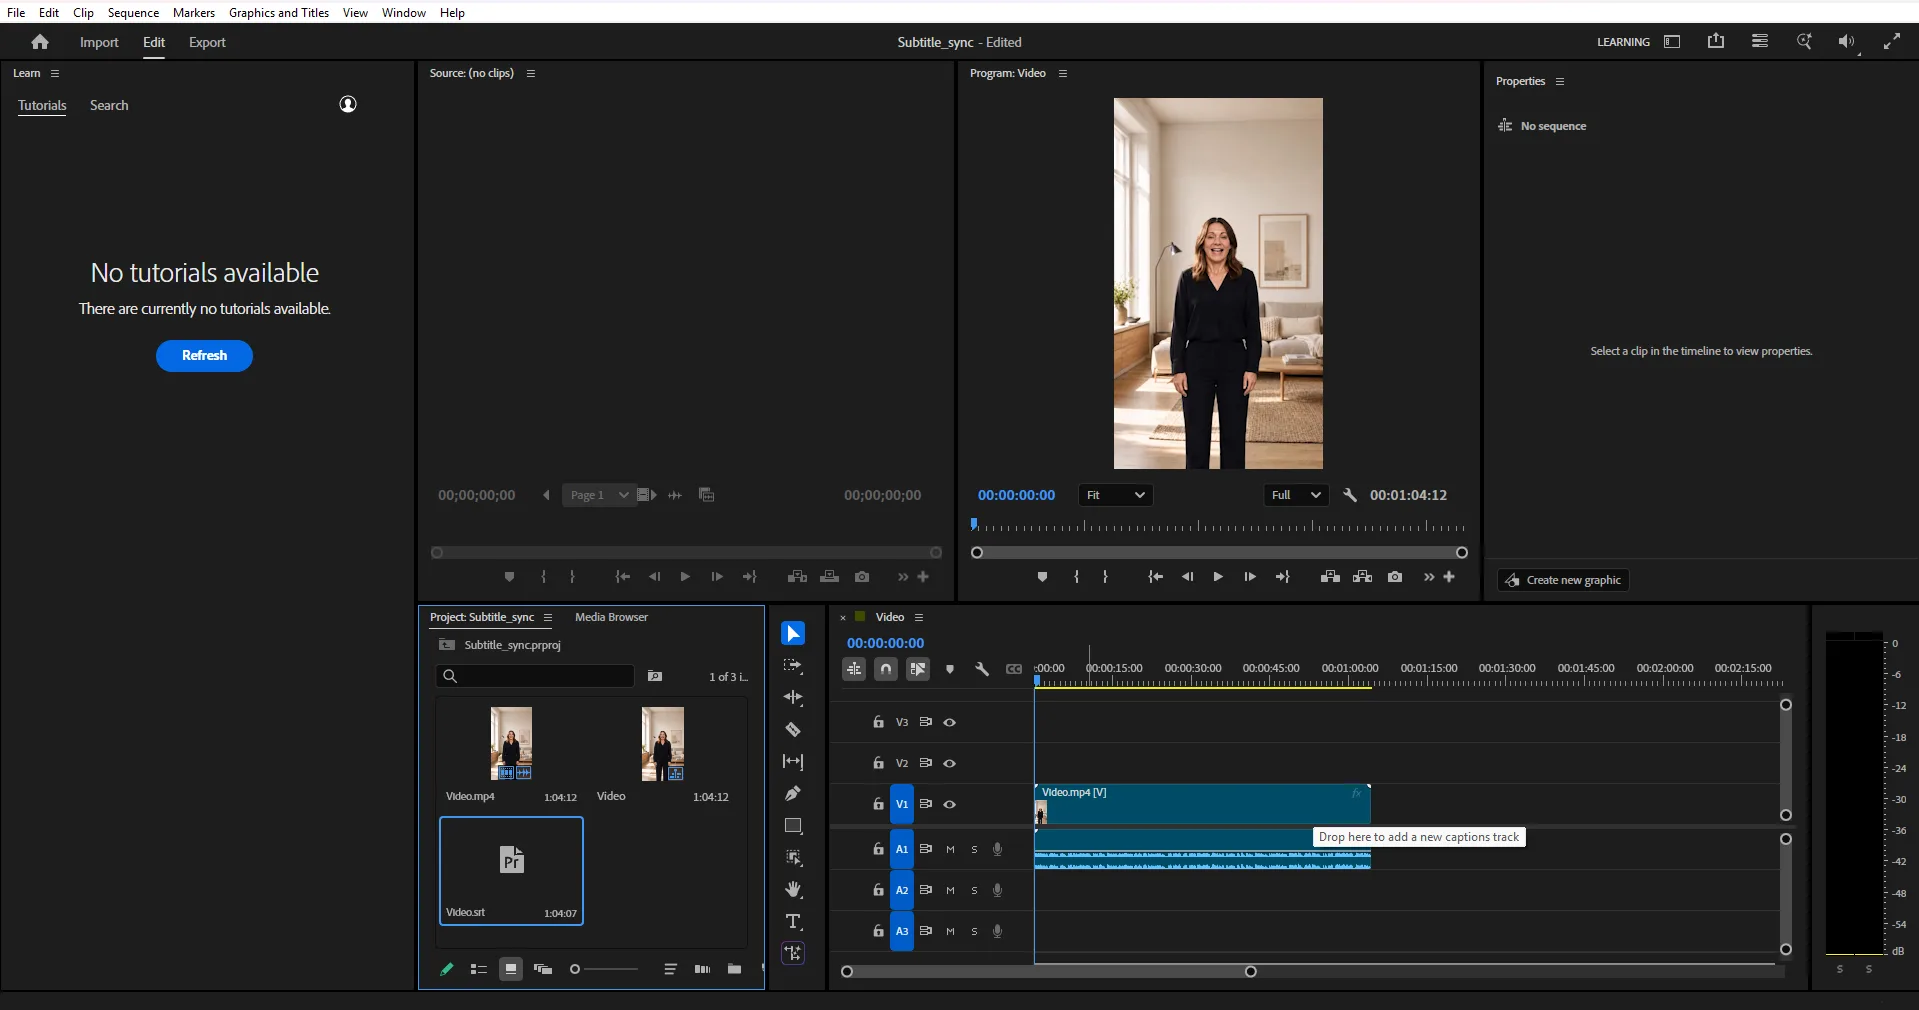
Step 2 Drag the SRT over the timeline. Pull it from the Project panel onto the sequence. A drop zone appears above the video tracks, labelled Drop here to add a new captions track. Release it there.
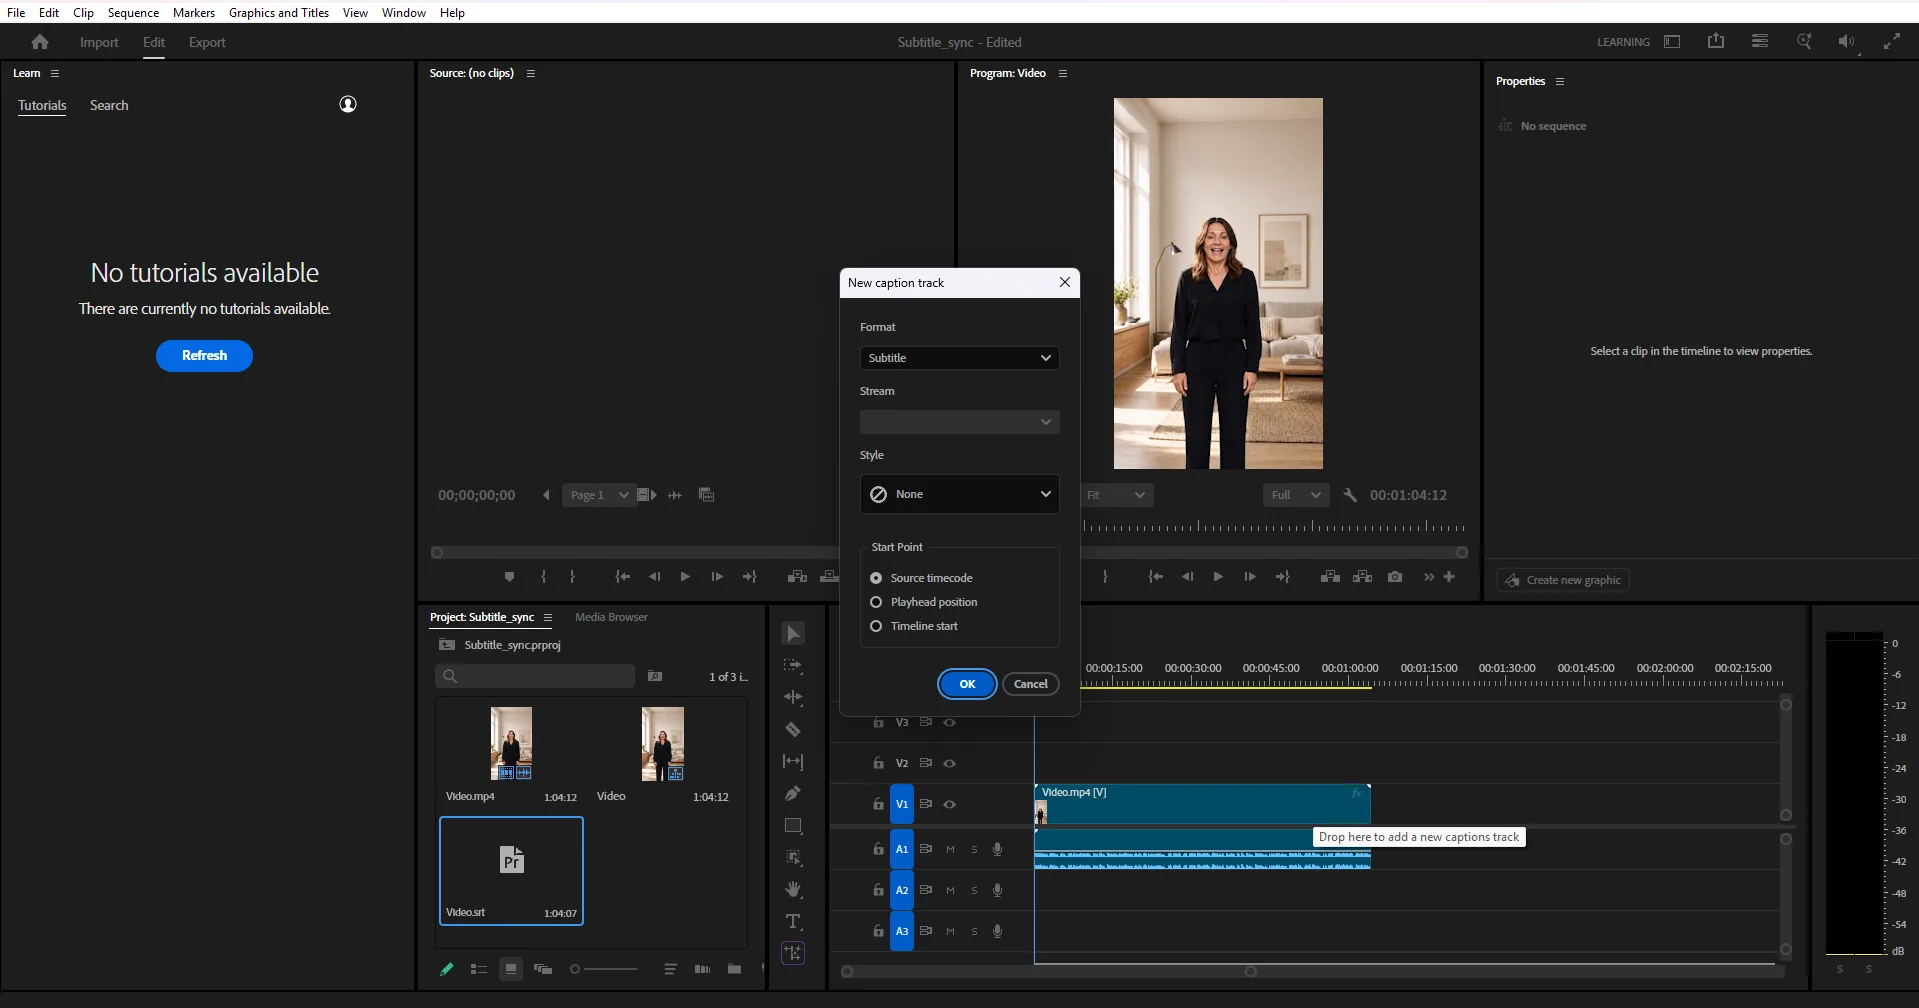
Step 3 Pick the caption type and start point. A New caption track dialog appears. The Format choice is the one that matters:
- Subtitle - what you want in almost every case. Freely positioned and styled, exports to file or burns in.
- CEA-708 / CEA-608 - broadcast closed captions. Fixed formatting rules, needed only if a broadcaster asked for them.
- Open captions - permanently rendered into the picture, no separate file.
Leave Style on None, set Start Point to Source timecode so each cue is placed by its own timestamp rather than relative to the playhead, and hit OK.
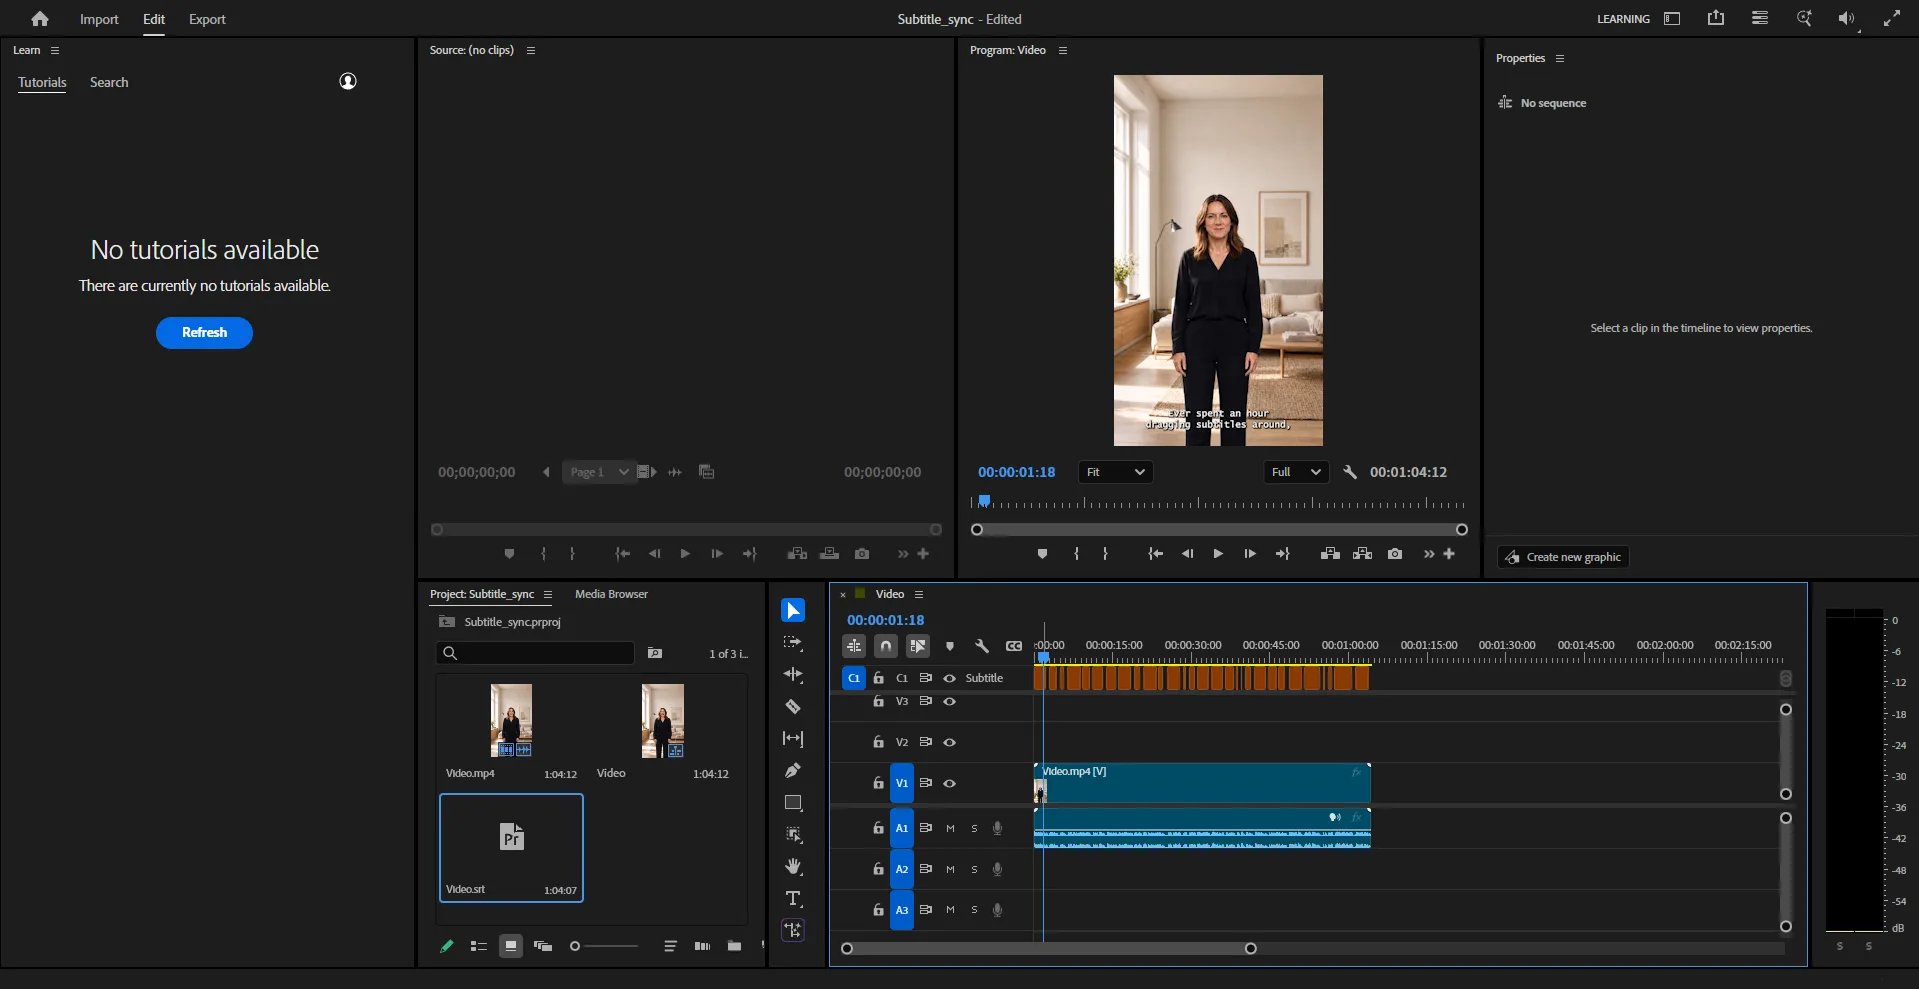
Step 4 Done. Every cue lands on its own caption track at its timestamp, and the Program monitor plays them over the video. No manual placement anywhere.
2. Style the caption track
Select any caption clip and open the Essential Graphics panel. Font, size, colour, background and position live there, and changes apply to the whole track rather than one cue. The Captions panel (Window → Captions) is where you edit the text itself and step between cues.
Keep captions inside the title-safe area - roughly the middle 80% of the frame - so nothing is clipped on TVs or hidden behind platform interface elements.
3. Premiere's own transcription
Premiere can transcribe a sequence itself (Window → Text → Transcript). It's convenient, and the text is usually decent. The timings are the weak point: like every speech-to-text tool, it estimates when each phrase occurred rather than measuring it, so captions tend to drift further into a long video.
If your captions look right at the start and lag by the end, that's the cause - and re-timing the words you already have is faster than re-typing anything. Our subtitle generator takes the SRT you already exported, alongside the video, and aligns every word to the audio.
4. Burn captions into the video
Social platforms don't read sidecar subtitle files, so captions have to be part of the picture. In the export dialog, open the Captions tab and choose Burn Captions Into Video. To export a separate file instead, choose Create Sidecar File and pick SRT.
Exporting both is common: burned-in for TikTok, Reels and Shorts, sidecar SRT for YouTube, where uploading a caption file is better for search than burning them in.
5. When it goes wrong
- Captions don't appear. The caption track is probably hidden - click the eye icon on the caption track header - or the Program monitor has captions disabled in its wrench menu.
- Everything lands in one cue. The SRT's blank lines between cues were lost. Re-export the file from a tool that writes standard SRT rather than hand-editing it.
- Captions drift. Estimated timings, not an import problem. Re-align the words against the audio.
- Accented characters look wrong. The file isn't UTF-8. Re-save it as UTF-8 without a BOM.
Premiere is happy with standard SRT and, unlike DaVinci Resolve, isn't fussy about line endings - either variant imports cleanly.