How to add subtitles in DaVinci Resolve (step by step)
DaVinci Resolve has real subtitle tracks, and an SRT drops onto one in about a minute once you know the two settings that decide whether it works. Miss them and you get the two classic failures: every subtitle fused into one block, or cues landing an hour away from the video. Here is the whole route, with screenshots from Resolve on Windows. It works the same in the free version.
1. Auto captions vs importing an SRT
Resolve can transcribe a timeline itself, under Create Subtitles from Audio. Two things to know before you go looking for it. First, it lives in the paid Studio edition, so if the menu item isn't there, that's why, and no amount of updating the free version will add it. Second, like every speech-to-text feature it estimates when each phrase was spoken, so on a long video the captions that matched at the start are visibly late by the end.
Importing an SRT sidesteps both problems: it works on the free version, and the timings are whatever the file says. That makes the file the thing worth getting right. Our subtitle generator aligns every word to the audio instead of estimating, and offers a download variant formatted exactly the way Resolve wants.
2. Get an SRT with CRLF line endings
SRT files written with Unix line endings (\n) import into Resolve as a single run-on block. Windows-style \r\n endings fix it. You can't see the difference in a text editor, which is why this bug eats hours.
00:00:01,240 --> 00:00:03,880␍␊
Welcome back to the channel.␍␊
␍␊
2␍␊
00:00:03,880 --> 00:00:06,720␍␊
Today we're looking at the Sigma 24-70.
On our download menu that's the SRT · CRLF line endings option, labelled for DaVinci and Premiere. Drop both files, the video and the SRT, into the Media Pool before you start.
3. Create the timeline at the right start timecode
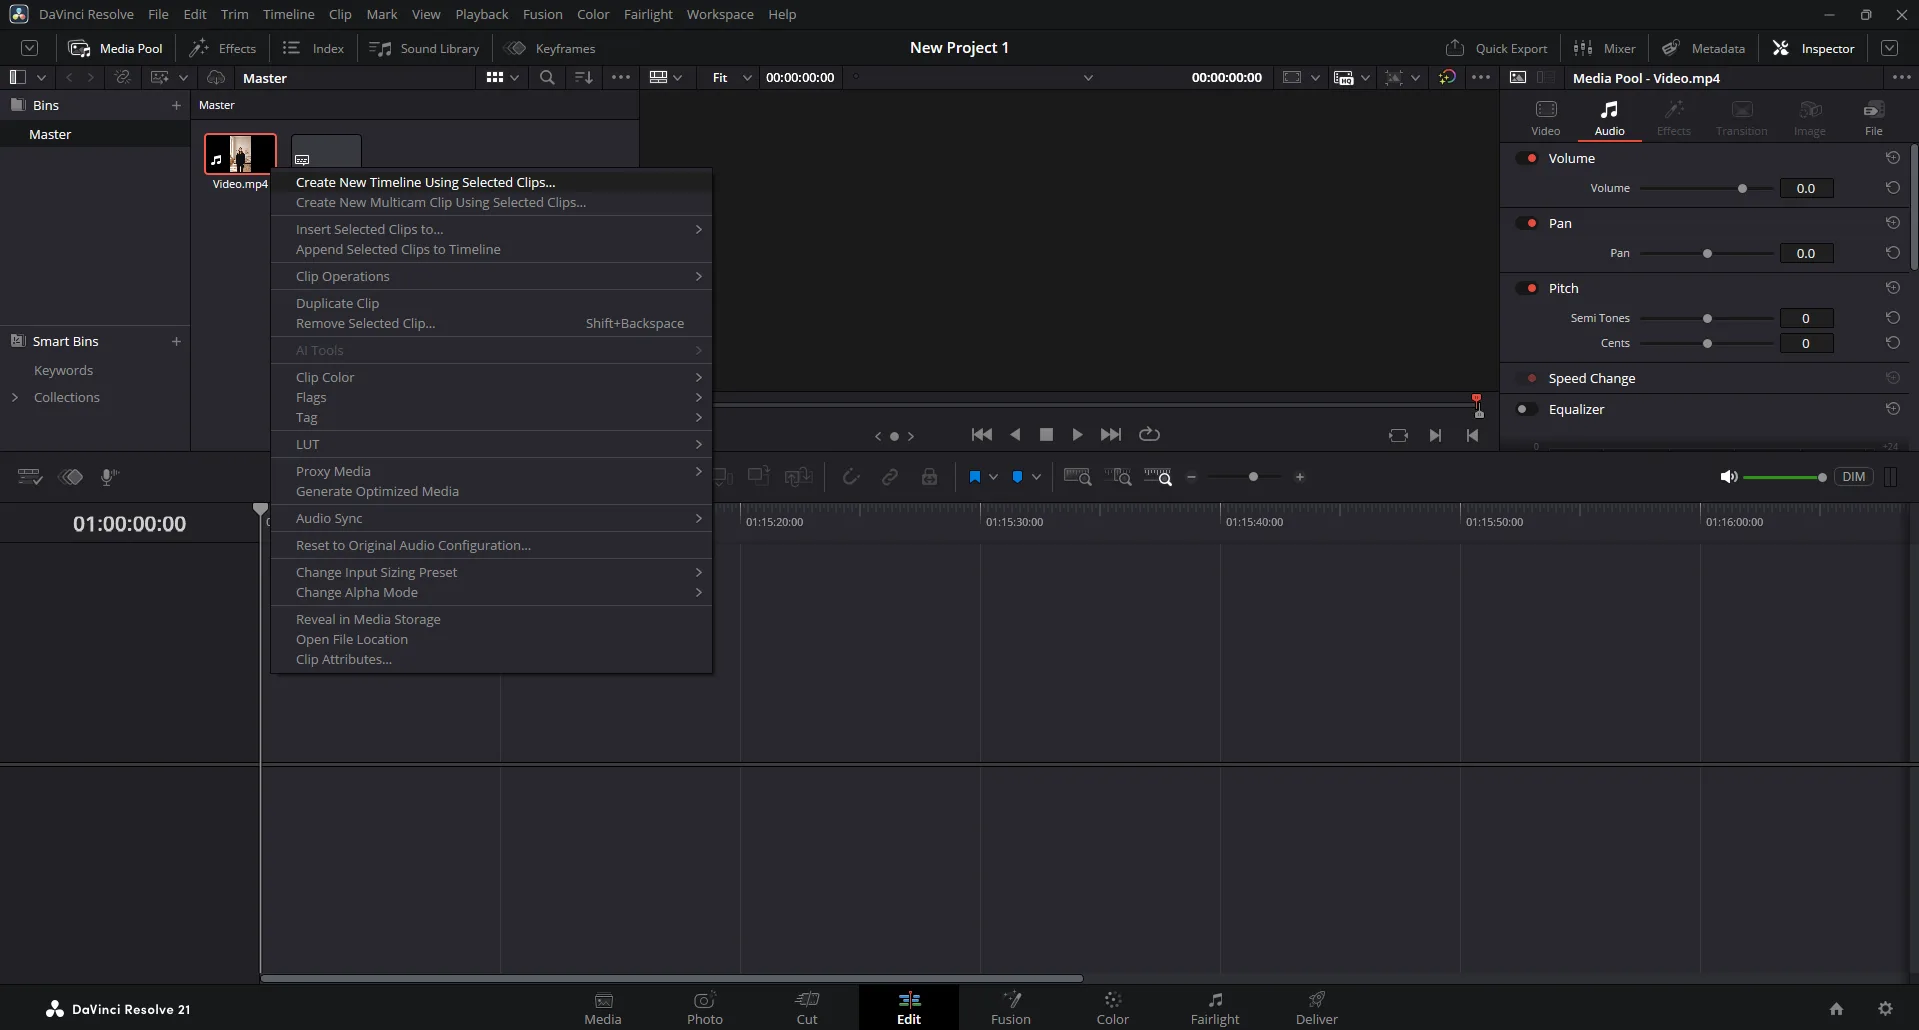
Step 1 Create a timeline from the clip. Right-click the video in the Media Pool and choose Create New Timeline Using Selected Clips…
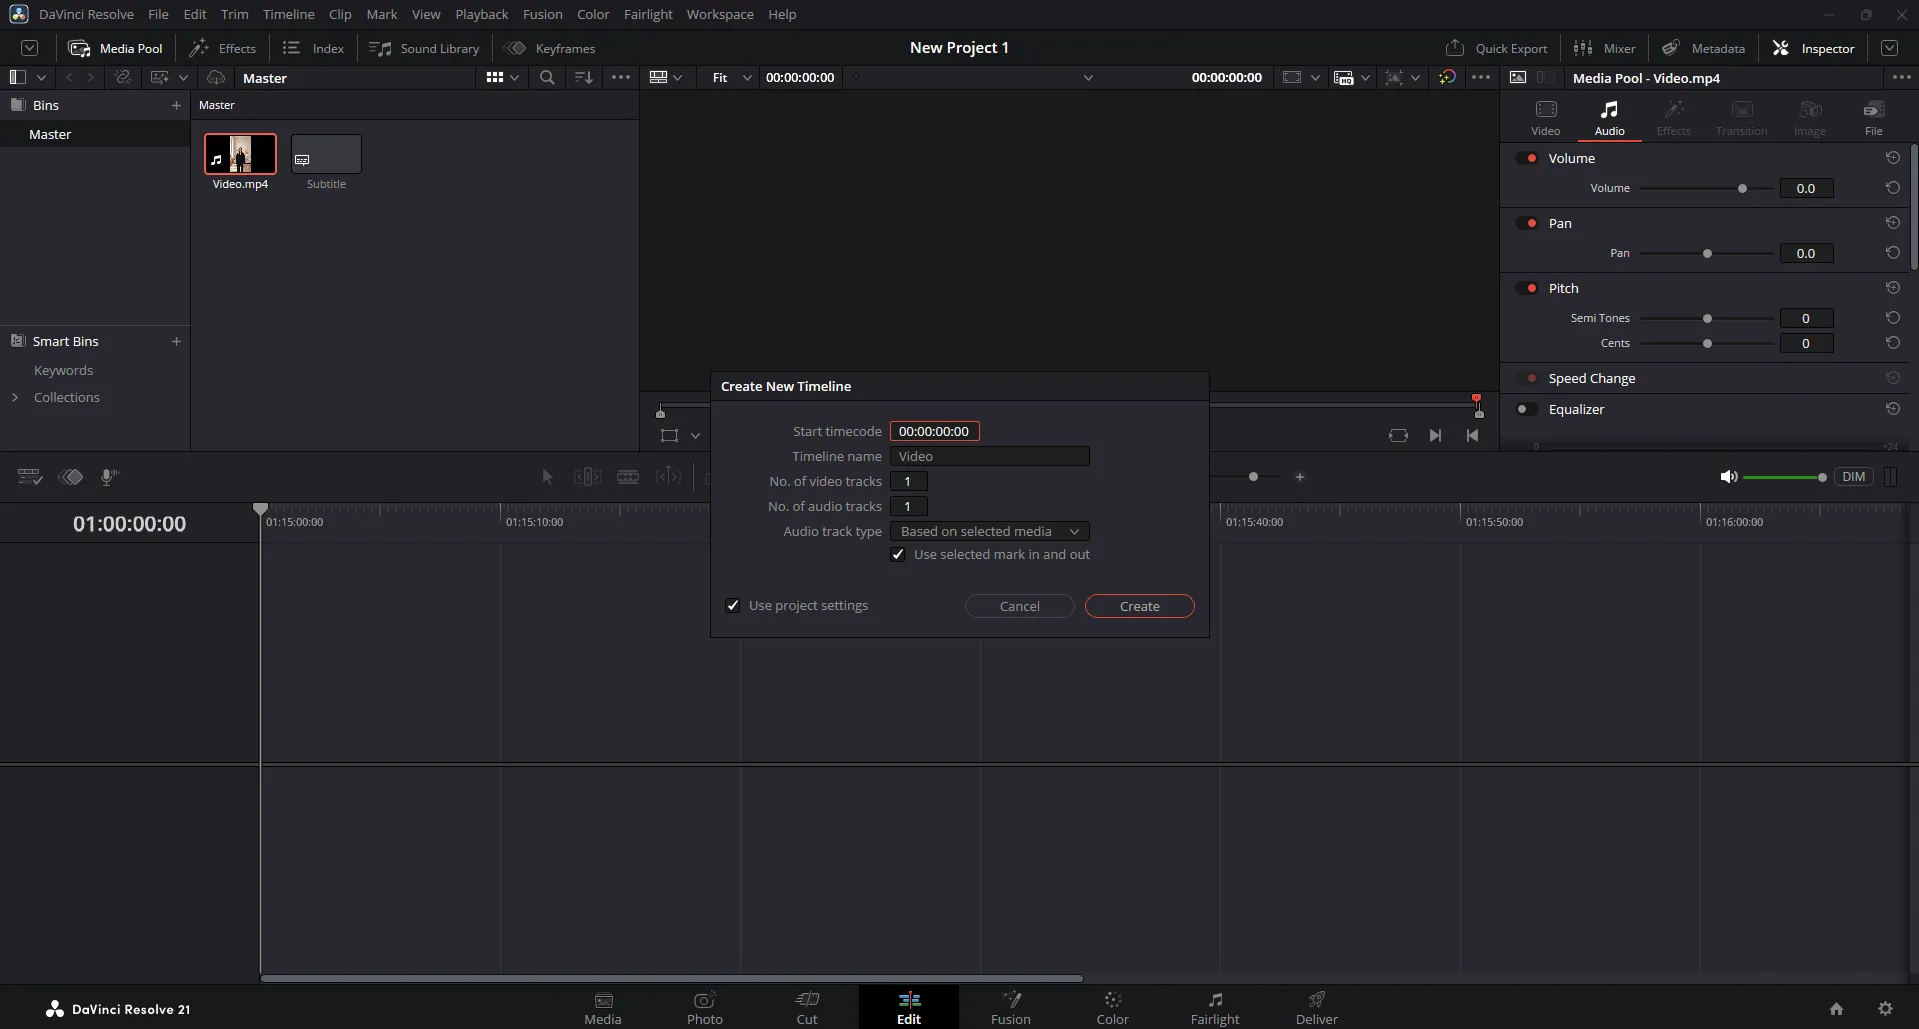
Step 2 Set the start timecode to 00:00:00:00. This is the setting that decides everything. Resolve timelines start at 01:00:00:00 by default, an hour in, because that is the broadcast convention. An SRT counts from zero. Since the import in step 6 places cues at their absolute timecode, an hour-offset timeline puts every subtitle an hour past your footage. Overwrite the field with 00:00:00:00 before you create.
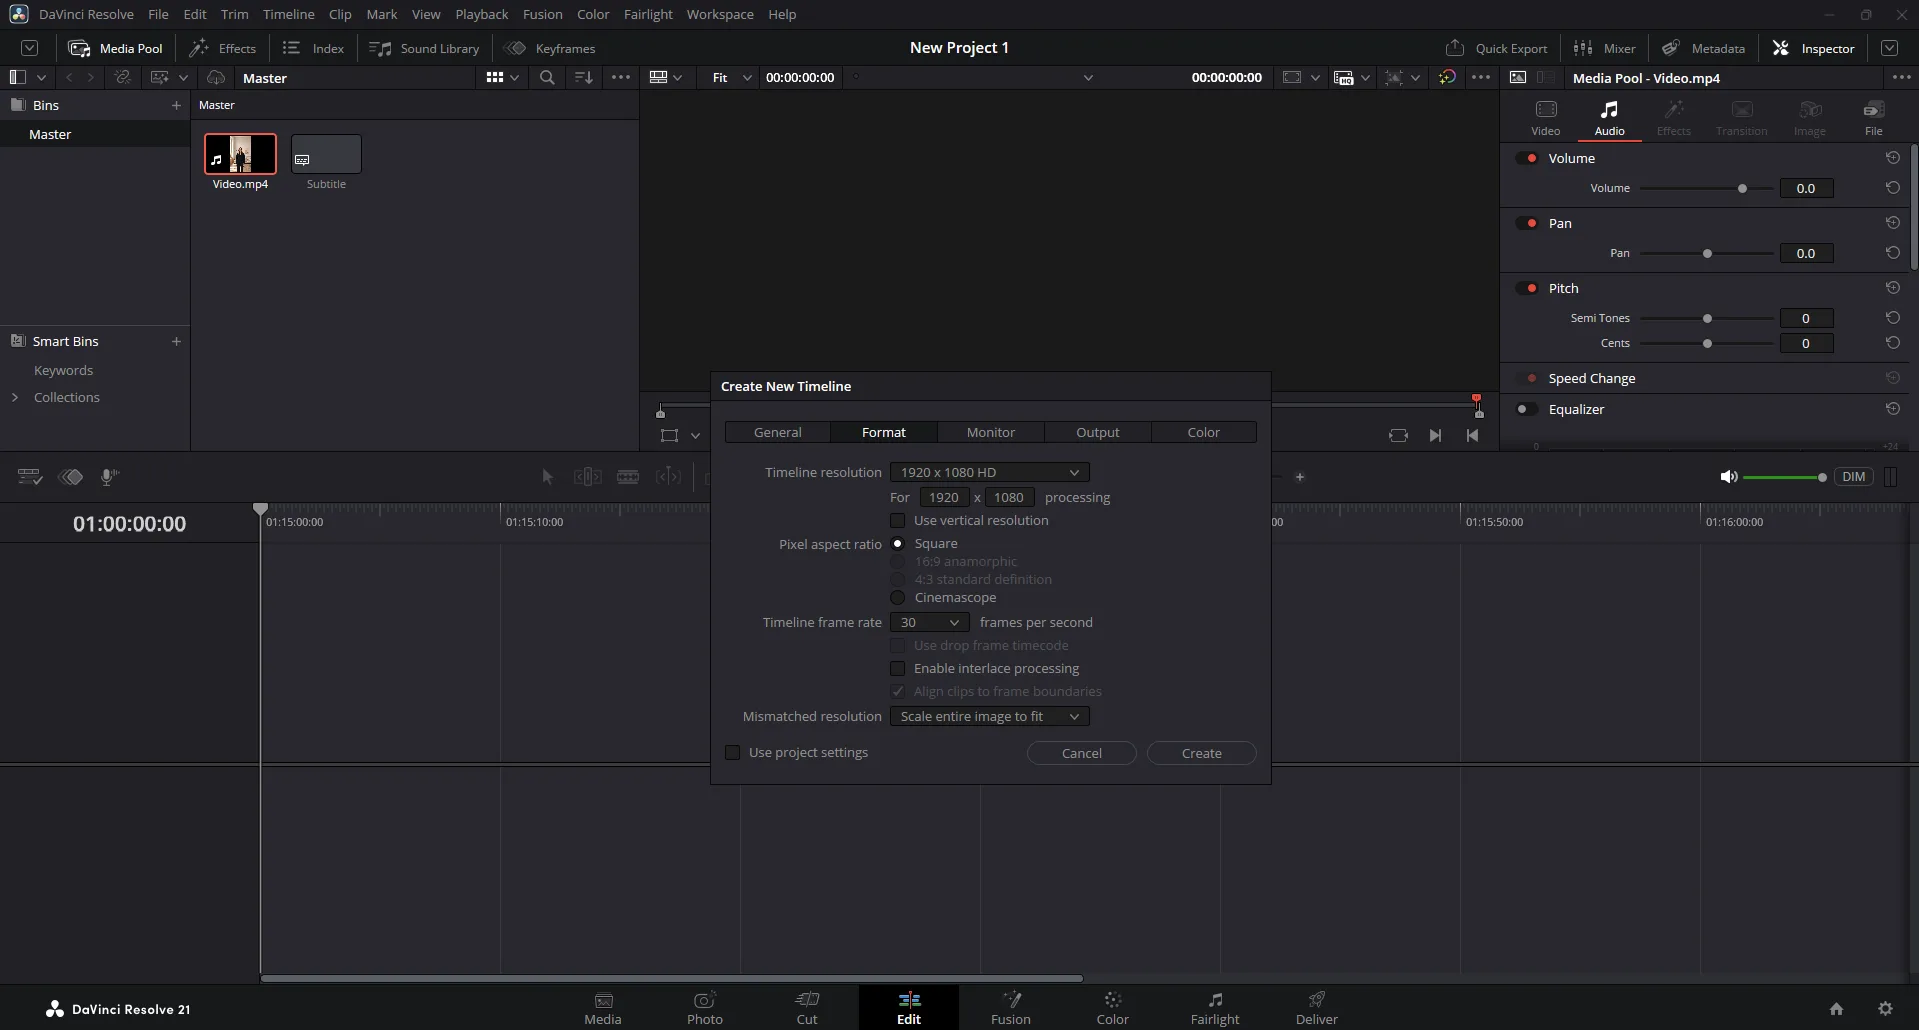
Step 3 Check the format (optional). Untick Use project settings and the dialog grows tabs. On the Format tab, pick the resolution - 1920 × 1080 for landscape, or tick Use vertical resolution for a 1080 × 1920 portrait timeline - and match the frame rate to your footage. Set it now: the frame rate locks once the timeline exists.
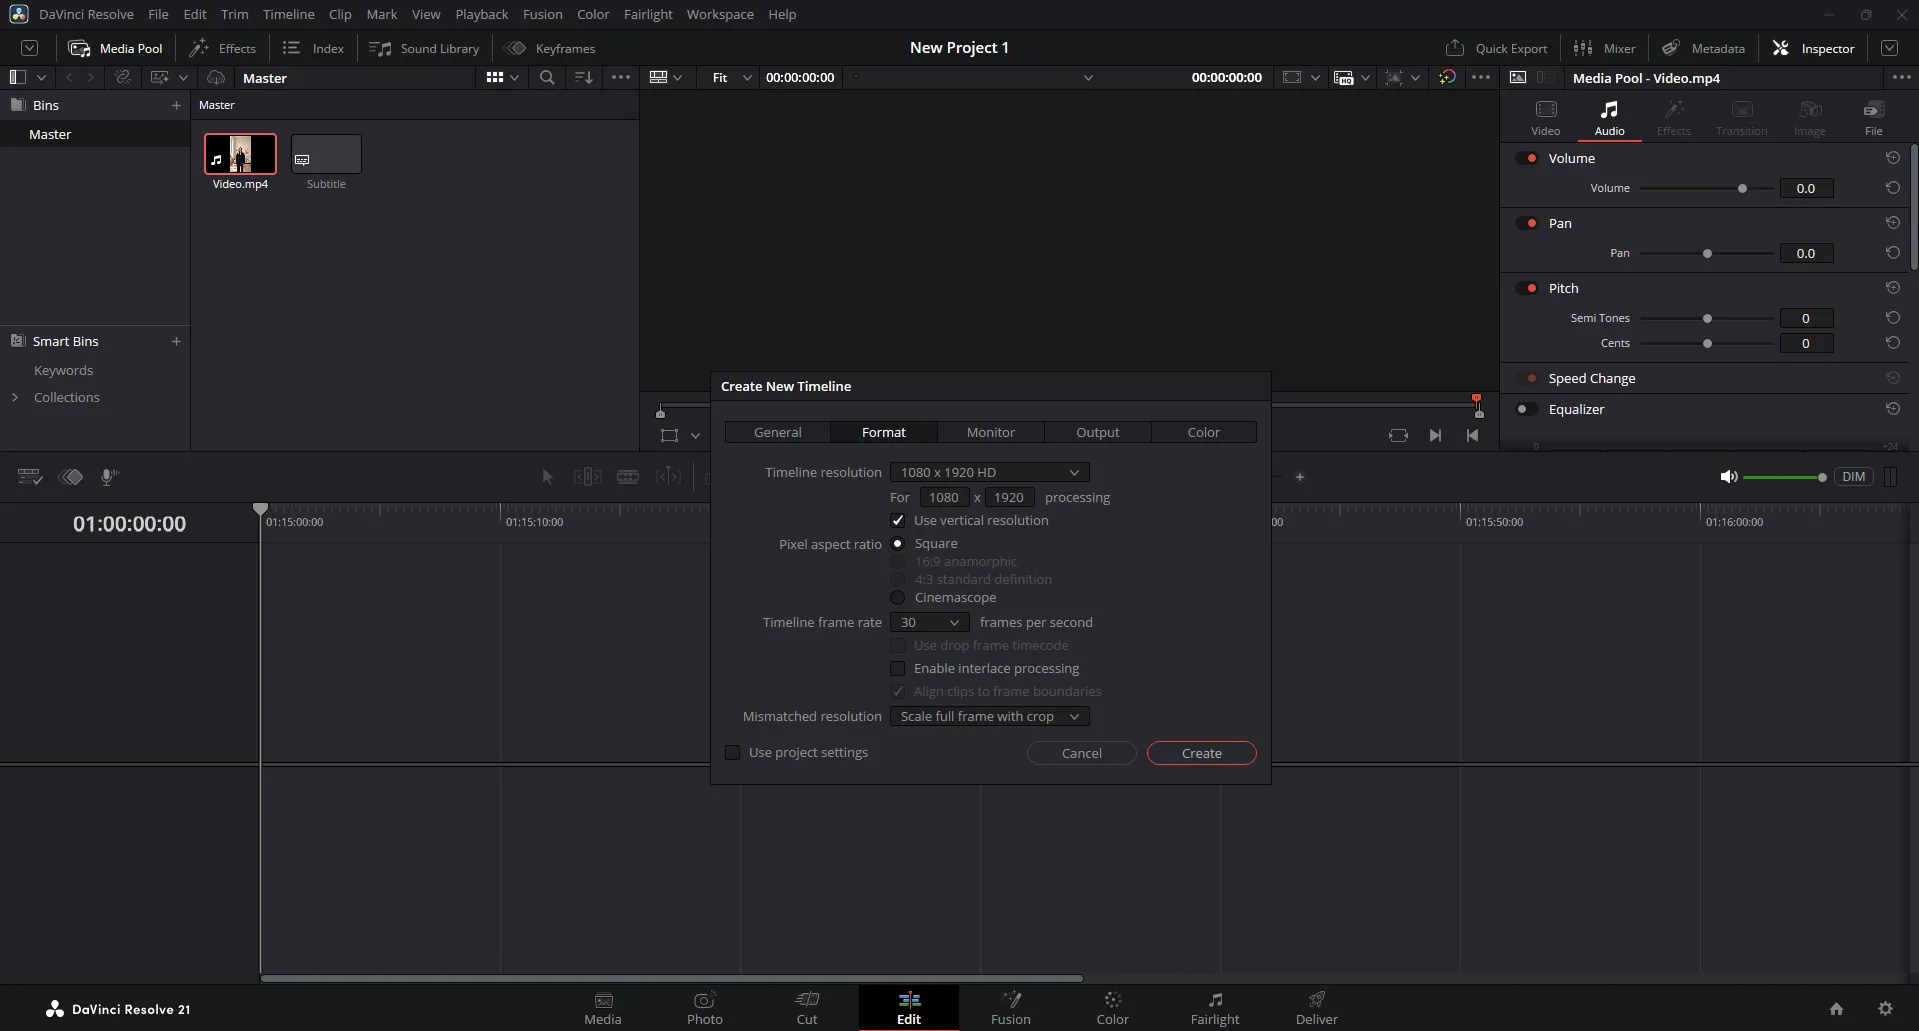
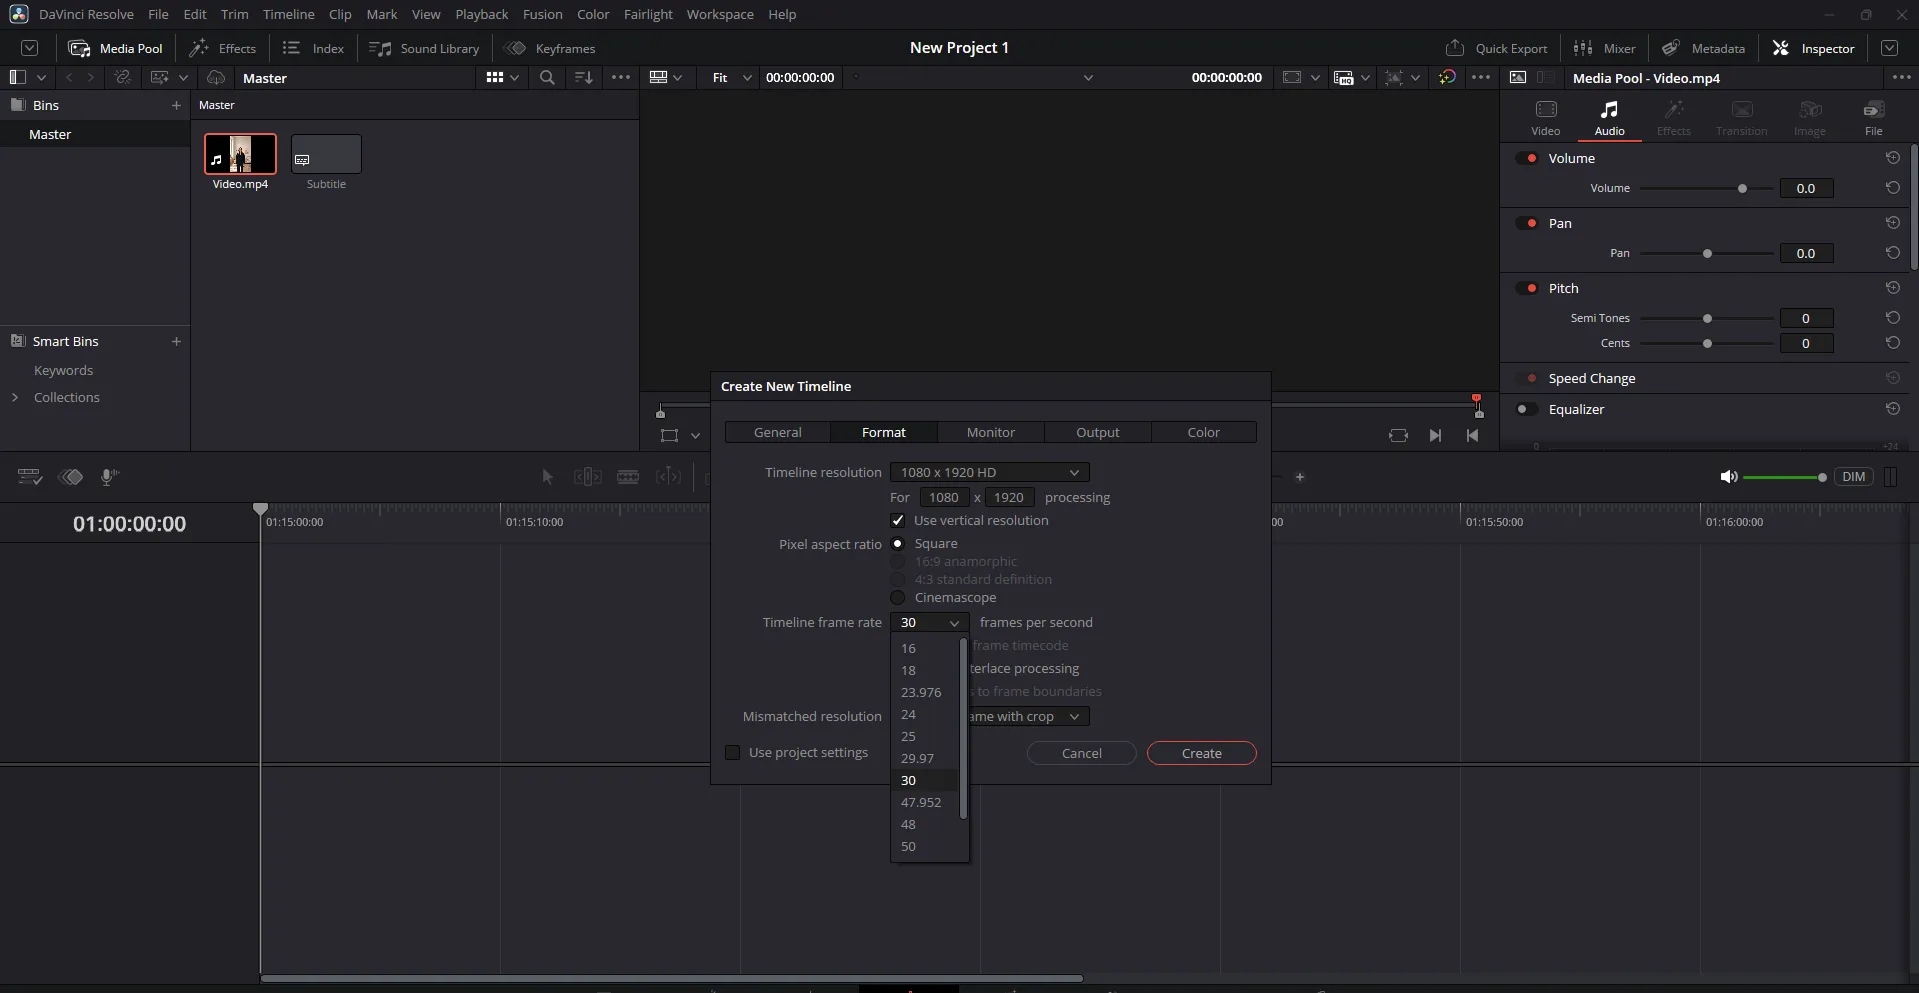
Step 4 Create the timeline. It appears with the video and audio in place, and the ruler starts at 00:00:00:00.
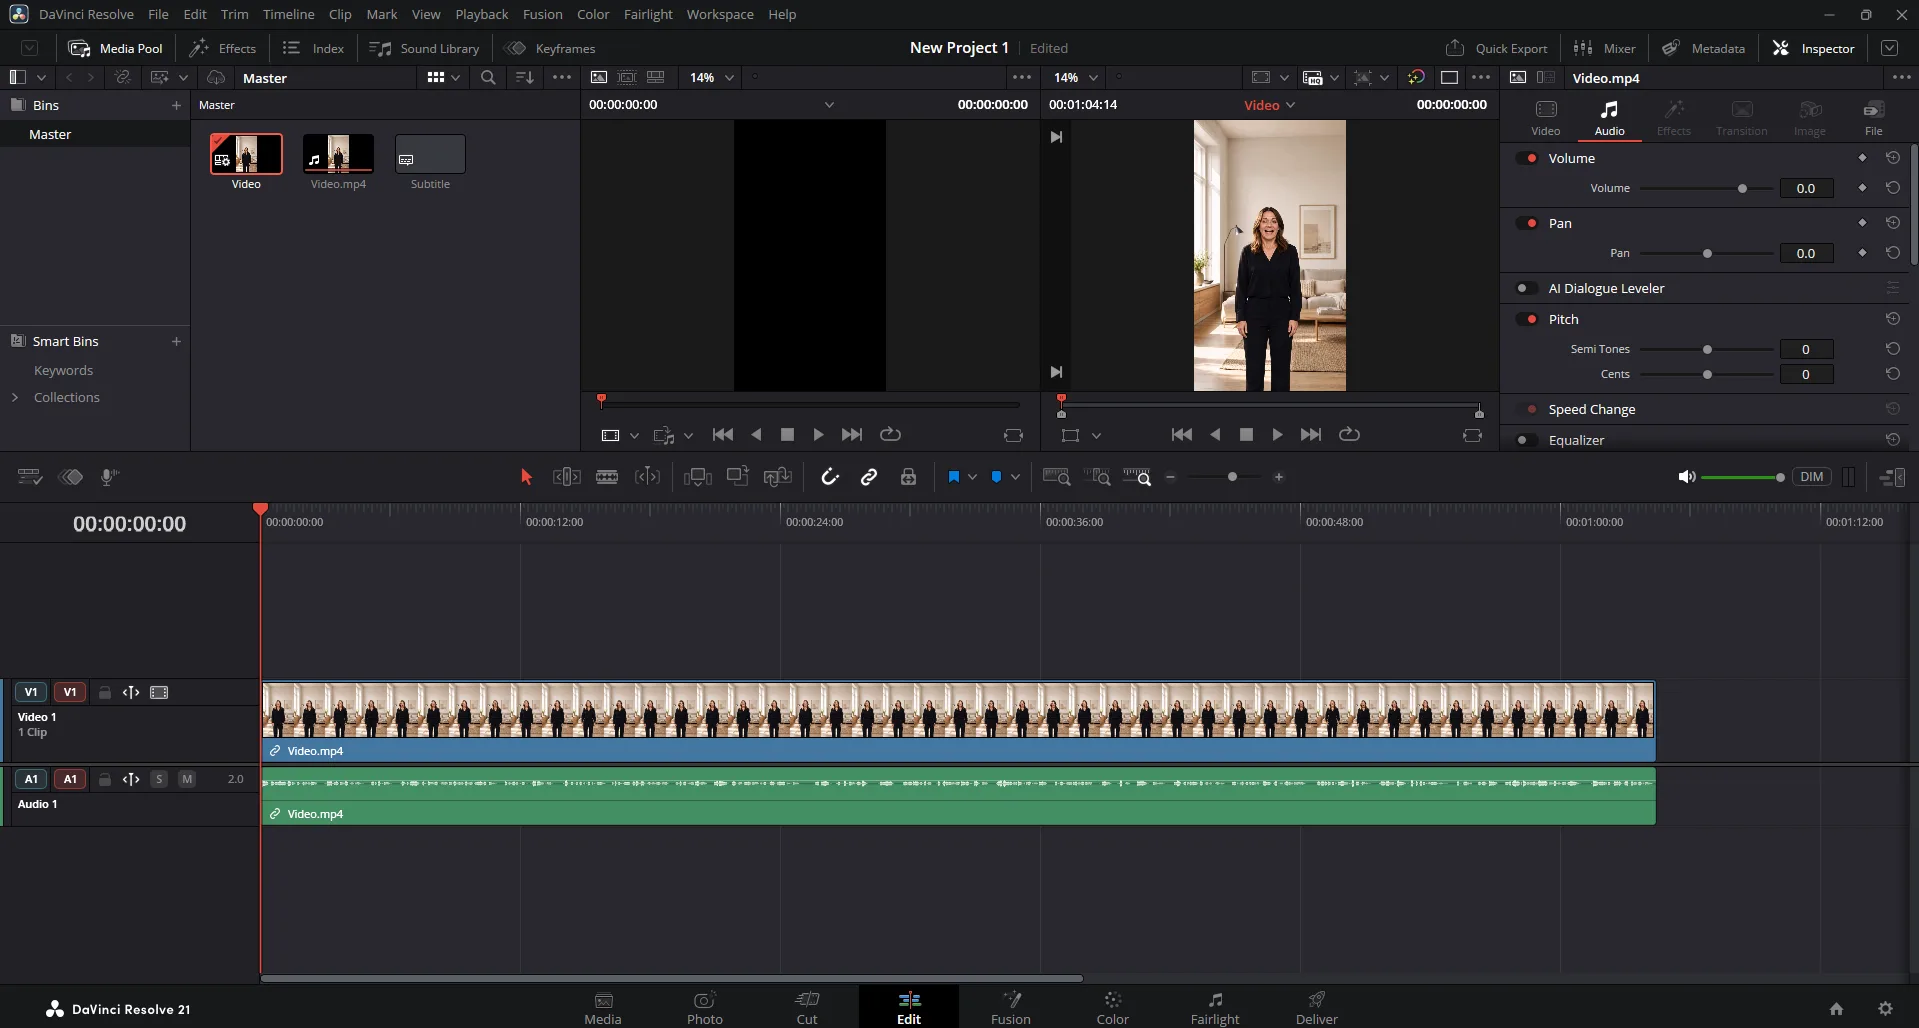
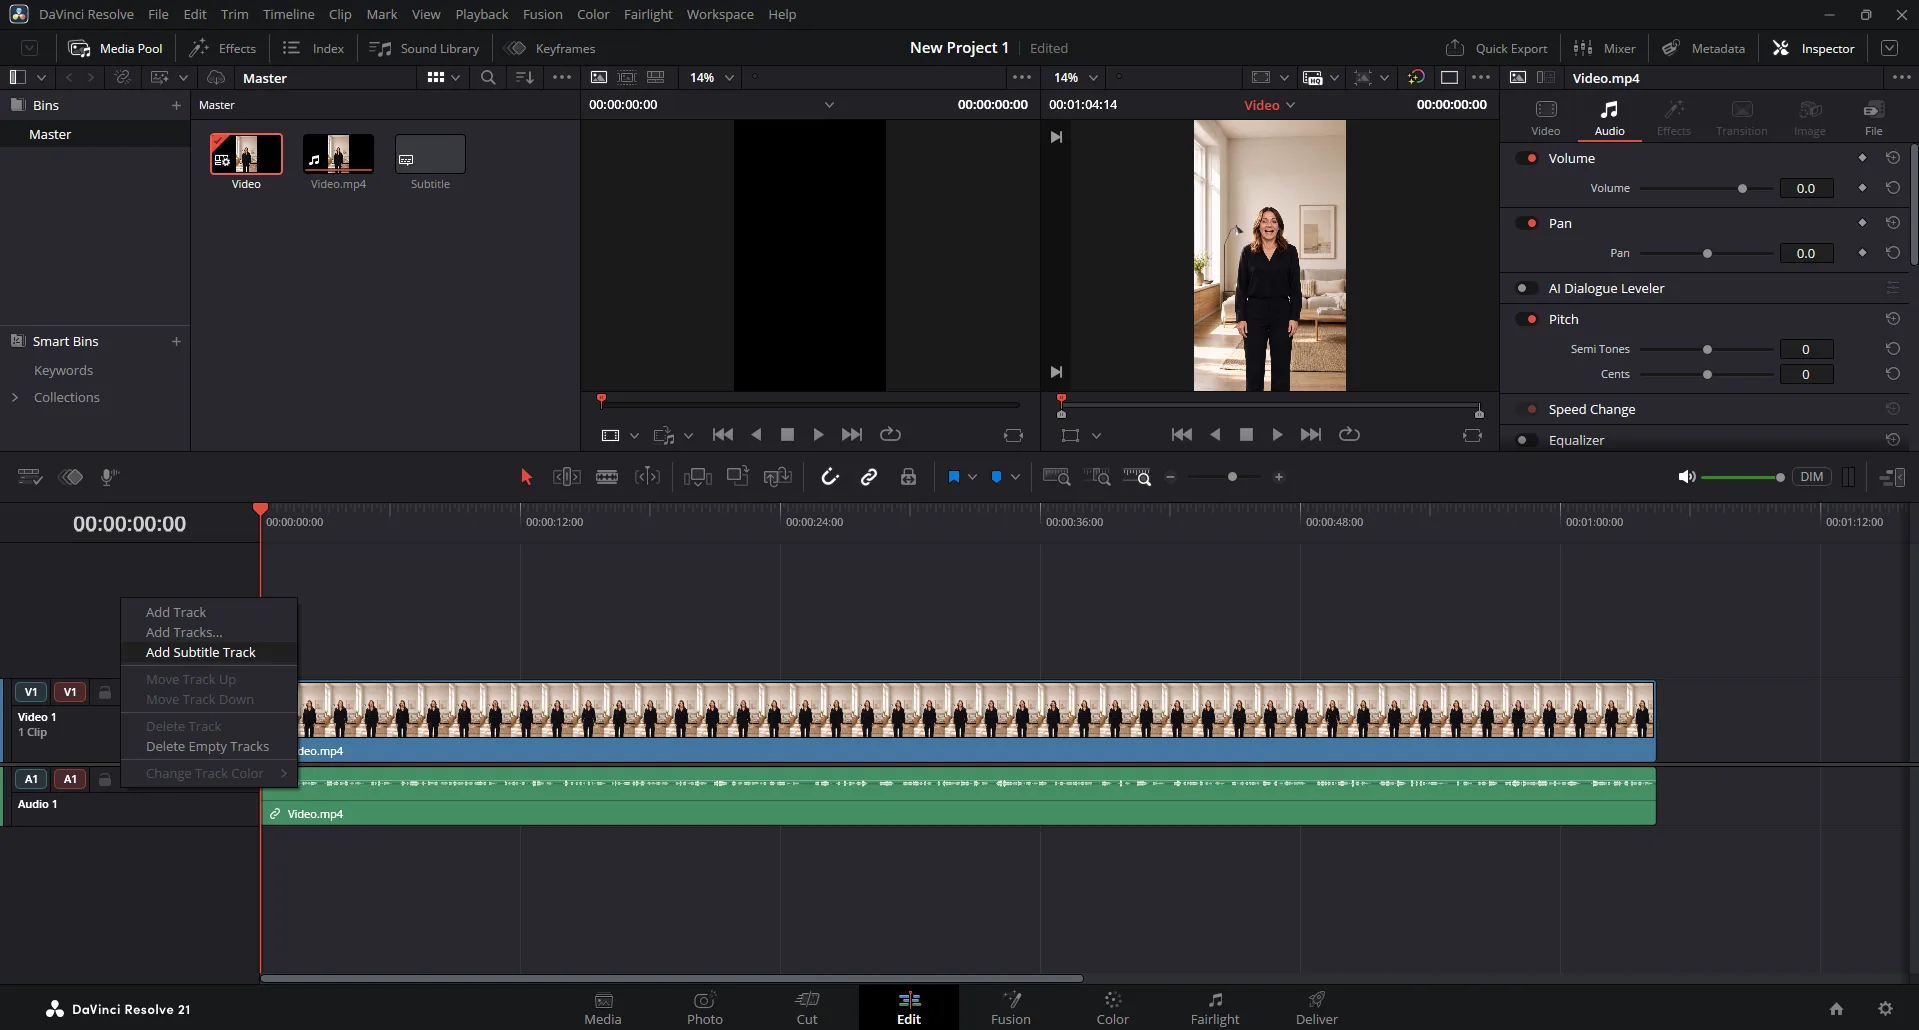
4. Add a subtitle track
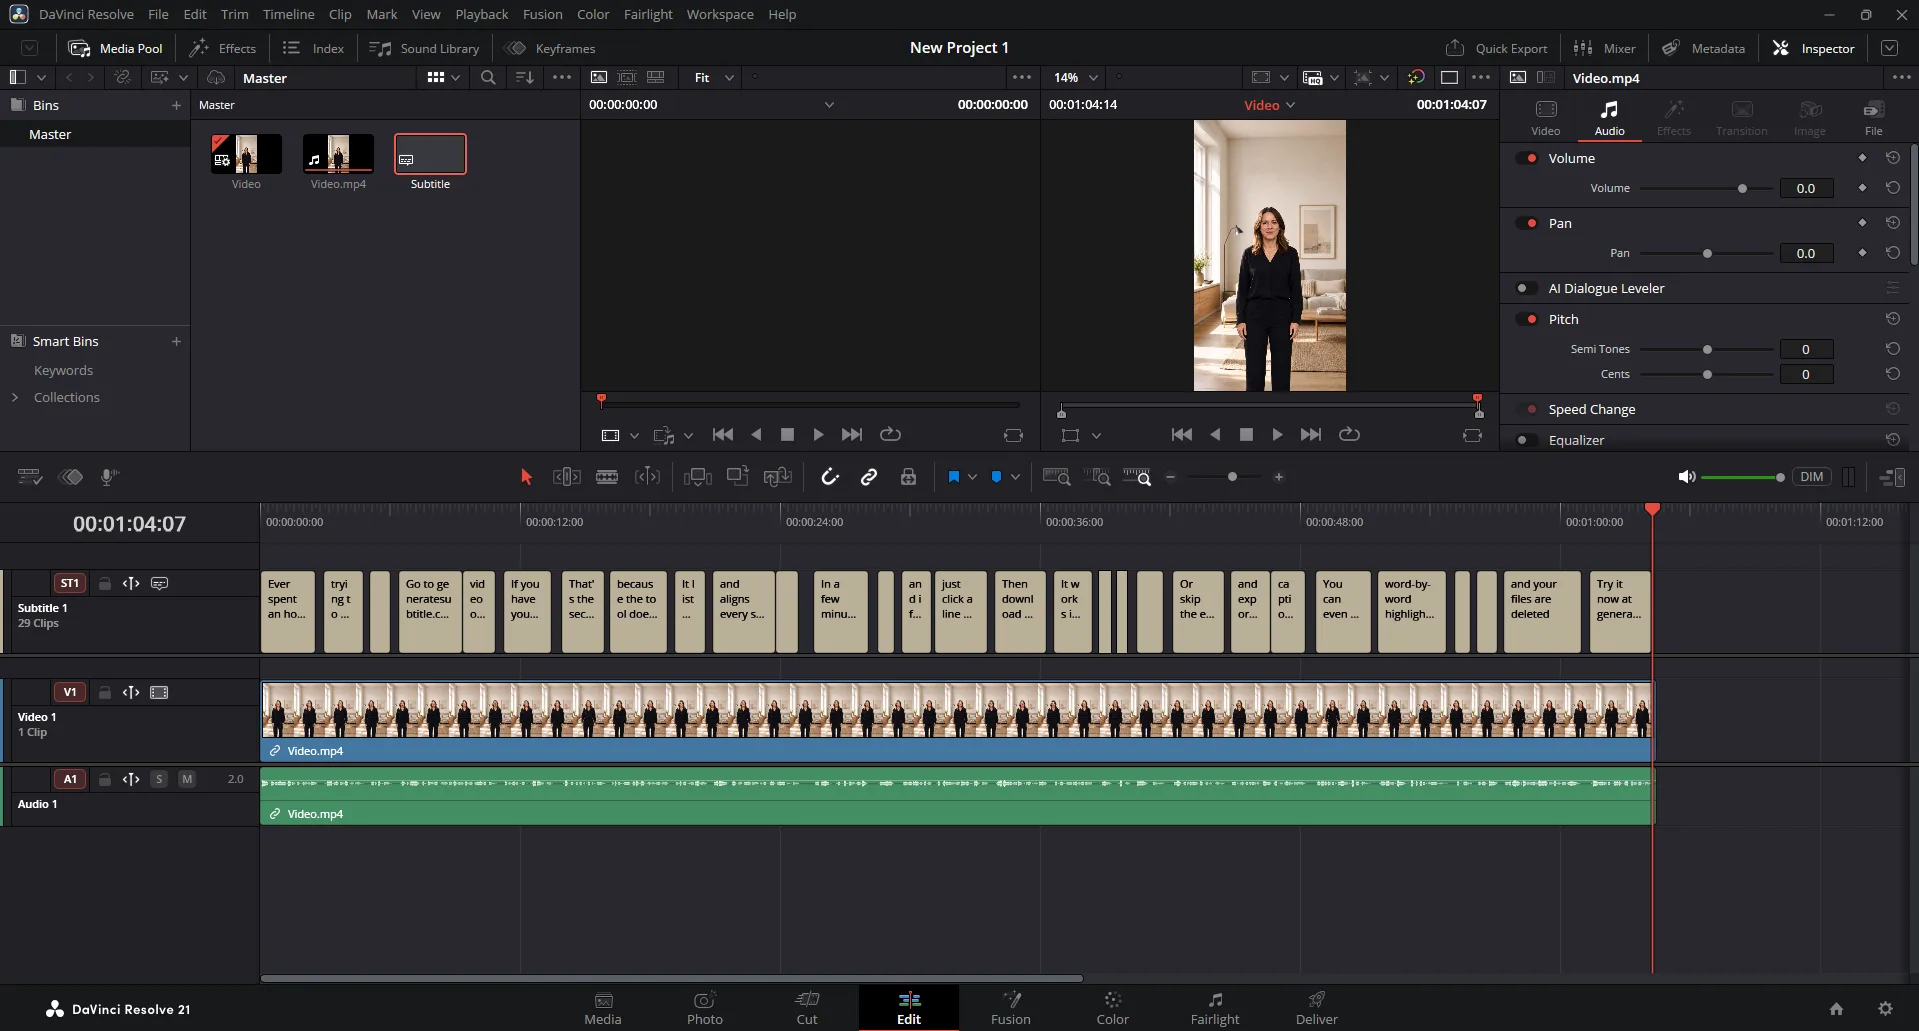
Step 5 Right-click in the empty track header area on the left of the timeline and choose Add Subtitle Track. A Subtitle 1 track appears above the video. Don't skip this: Resolve will not create the track for you, and with no track to receive them the import in the next step quietly does nothing at all - no error, no cues, nothing.
5. Insert the subtitles by timecode
Step 6 Back in the Media Pool, right-click the SRT and choose Insert Selected Subtitles to… → Timeline Using Timecode. The plain Timeline option dumps the cues wherever the playhead happens to sit; the timecode option reads each cue's own timestamp, which now matches your timeline exactly because it starts at zero.
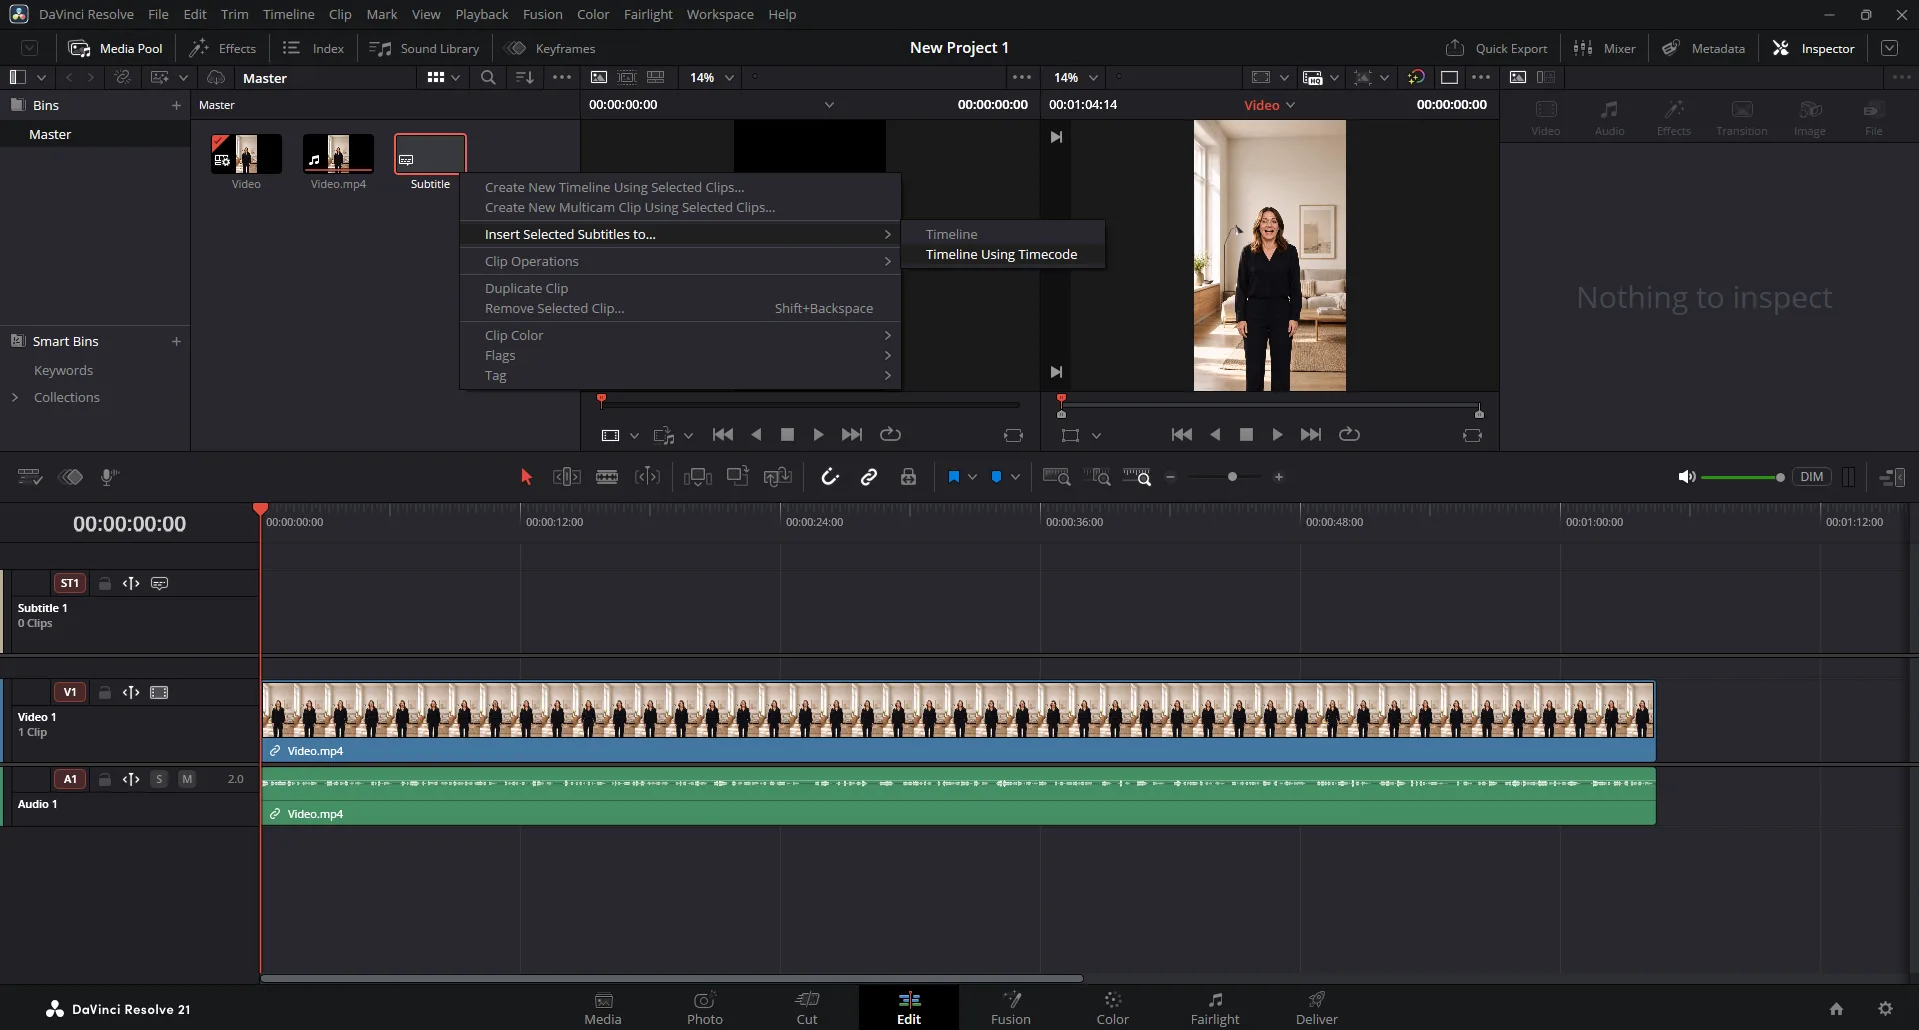
Every cue lands on the subtitle track at its own timestamp. No dragging, no nudging.
6. Style the subtitles
Select the subtitle track and open the Inspector. Font, size, colour, outline, background and position live there, and the changes apply to the whole track rather than one cue at a time. Keep the text inside the title-safe area, roughly the middle 80% of the frame, so nothing gets clipped on TVs or hidden behind platform interface elements.
If you would rather not style anything, our generator can burn subtitles into the video for you with the font, size, colour, outline and background box already set, and hand you back a finished MP4.
7. Using AutoSubs instead?
AutoSubs, the popular Resolve plugin, expects LF endings, the exact opposite of what Resolve's own importer wants. Download the SRT · LF line endings variant for it instead. Same subtitles, different plumbing.